
Plugin: Dynamic Template

With our Dynamic Template plugin, we further enhance Shopware's content management system. Shopware offers a feature called Shopping Experiences, which allows you to create and centrally manage content pages such as landing pages, shop pages, and category layouts.
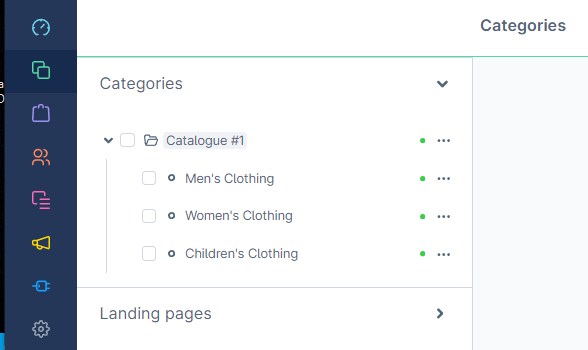
These layouts are composed of sections, where individual blocks are added. These blocks can consist of various elements like text or images. In Shopping Experiences, you can create a layout and apply it to your content pages. For instance, you might create a layout for your category pages and use it for categories like Men's Clothing, Women's Clothing, and Children's Clothing.
Reusability
This system is efficient because it allows you to define a layout once and reuse it across multiple pages.
However, what if you don't want a specific content block to appear on all category pages?
Visibility per element
This is where our plugin comes in. With "Dynamic Template", content editors can decide whether each content block is visible on a given page.
Without our plugin, you would need to create different layouts for each category page, leading to increased maintenance and a cluttered backend system. By using our plugin, you can maintain a single layout and enhance its flexibility by choosing which content blocks to show or hide.
HowTo use Dynamic Template
You’ve downloaded our plugin from the Shopware store – that's fantastic! Now, it's time to learn how to make the most of it. Follow this tutorial to get started with the "Dynamic Template" plugin. First, as always, ensure the plugin is installed and activated.
For the impatient: Go to summary
The scenario
Let's assume we have an online store selling clothes for men, women, and children. We want to create a single layout to use across all three categories. While the category pages are largely similar, each featuring a header image and text blocks promoting the category, there are subtle differences for each one.
For instance, the Children's clothing category page showcases cool glowing shoes with flashing lights, which we don’t offer for adults. This creates a distinction between the adults' category pages and the children's category page.
Of course, we could create two different layouts: one for the adults' category pages and one for the children's category page. However, this would increase maintenance overhead and clutter our backend with numerous similar layouts that have only minor differences.
Instead, let's use our plugin to solve this problem in a more elegant and efficient way.
Creating the layout
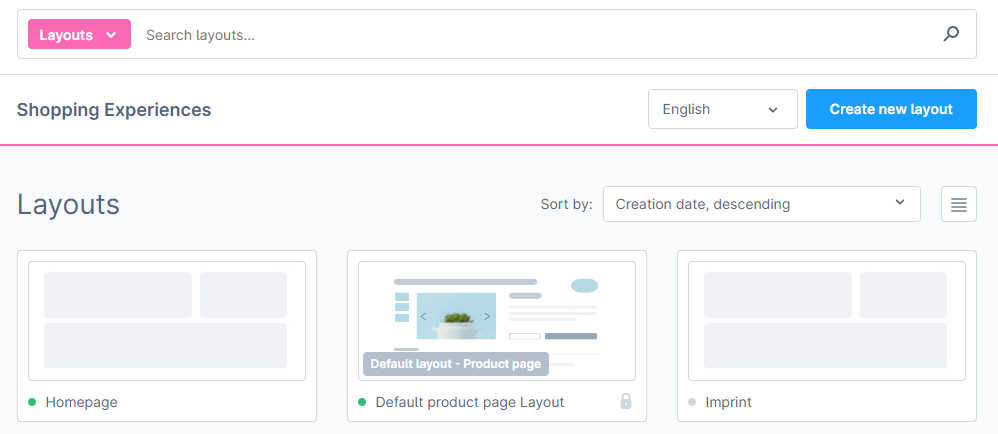
Go to Shopping Experiences -> Layouts and either create a new Layout or modify an existing one. In this example we are modifying the Homepage layout.
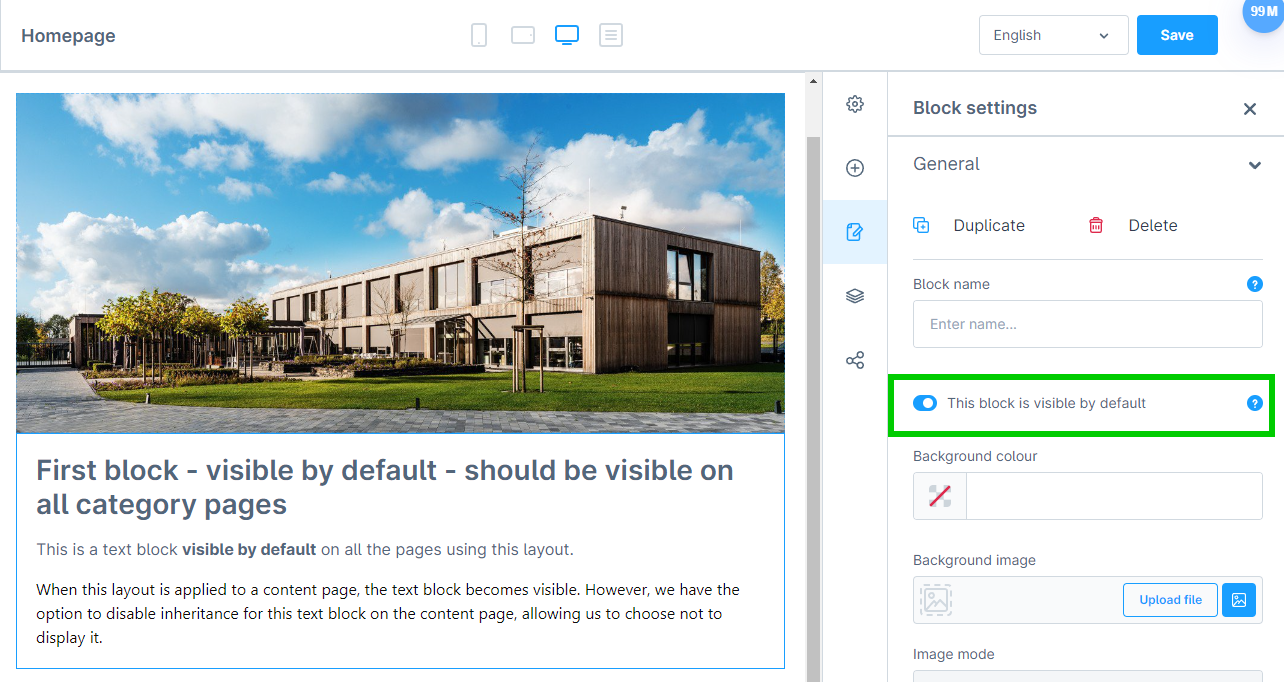
In your layout, add a new block, such as a text block, as shown in the screenshot below. You will notice a new element in the block settings. This toggle allows you to show or hide the block by default across all instances where your layout is applied.
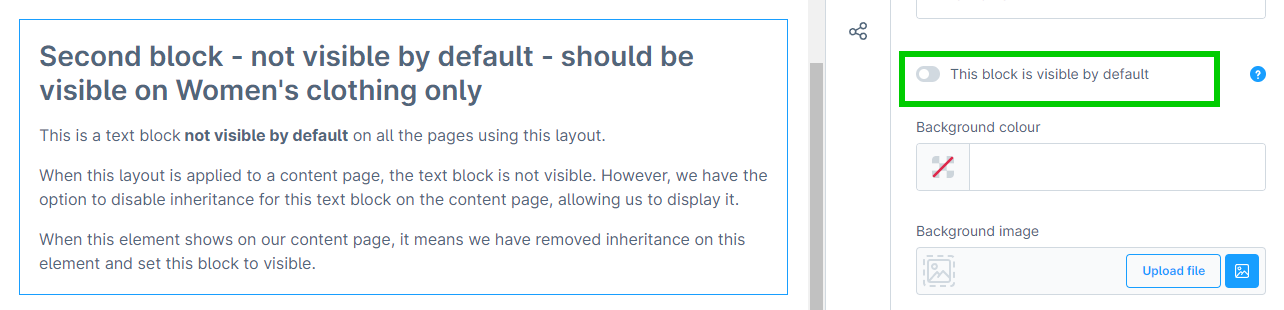
Now add a second text block and set the hide/show toggle to off, as shown in the screenshot below.
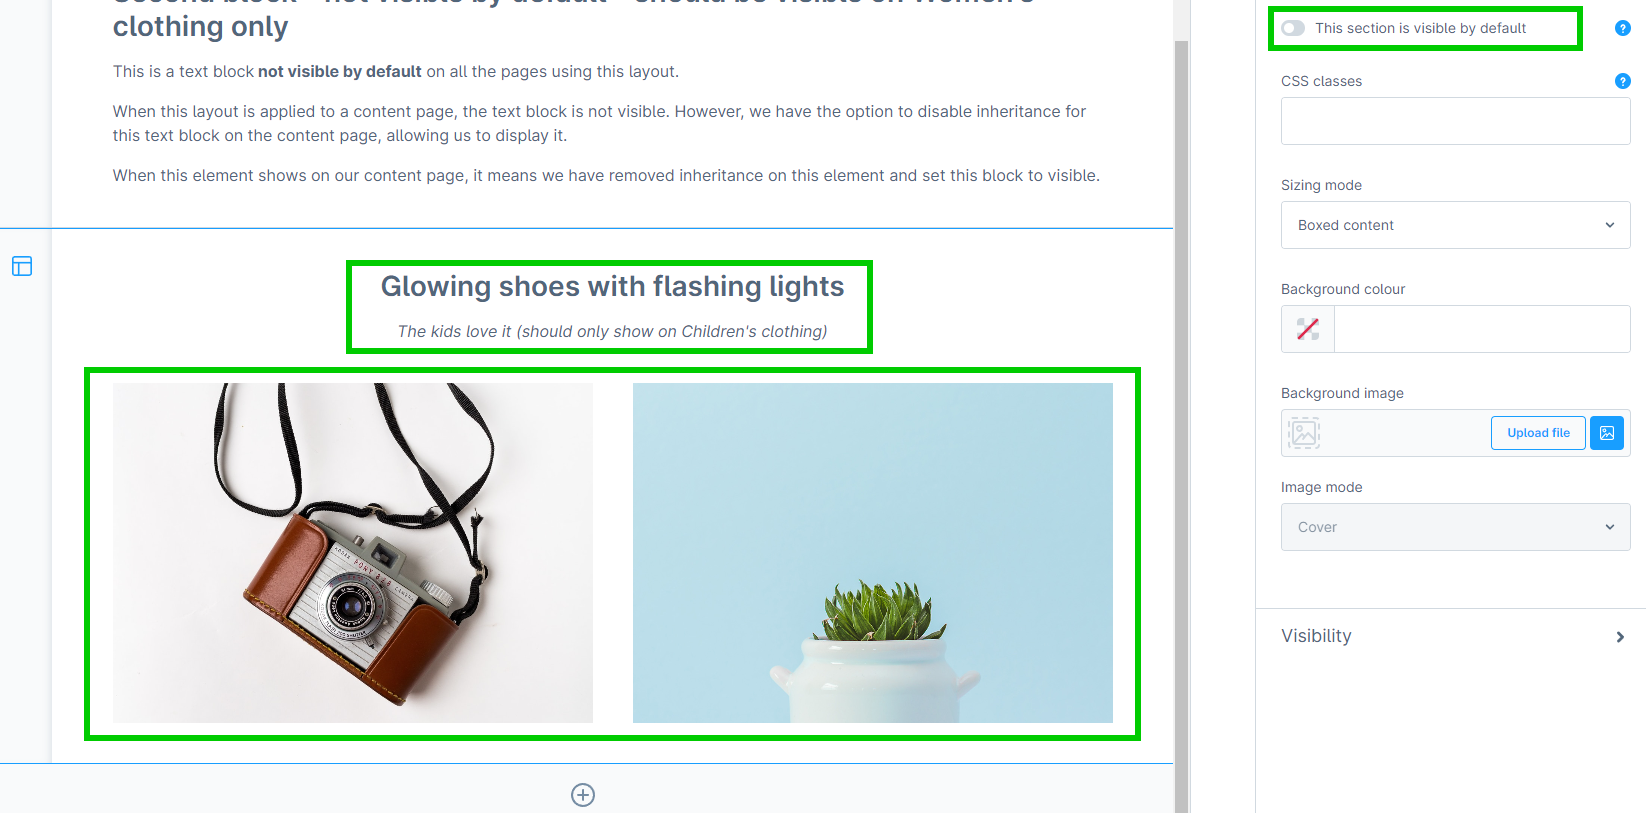
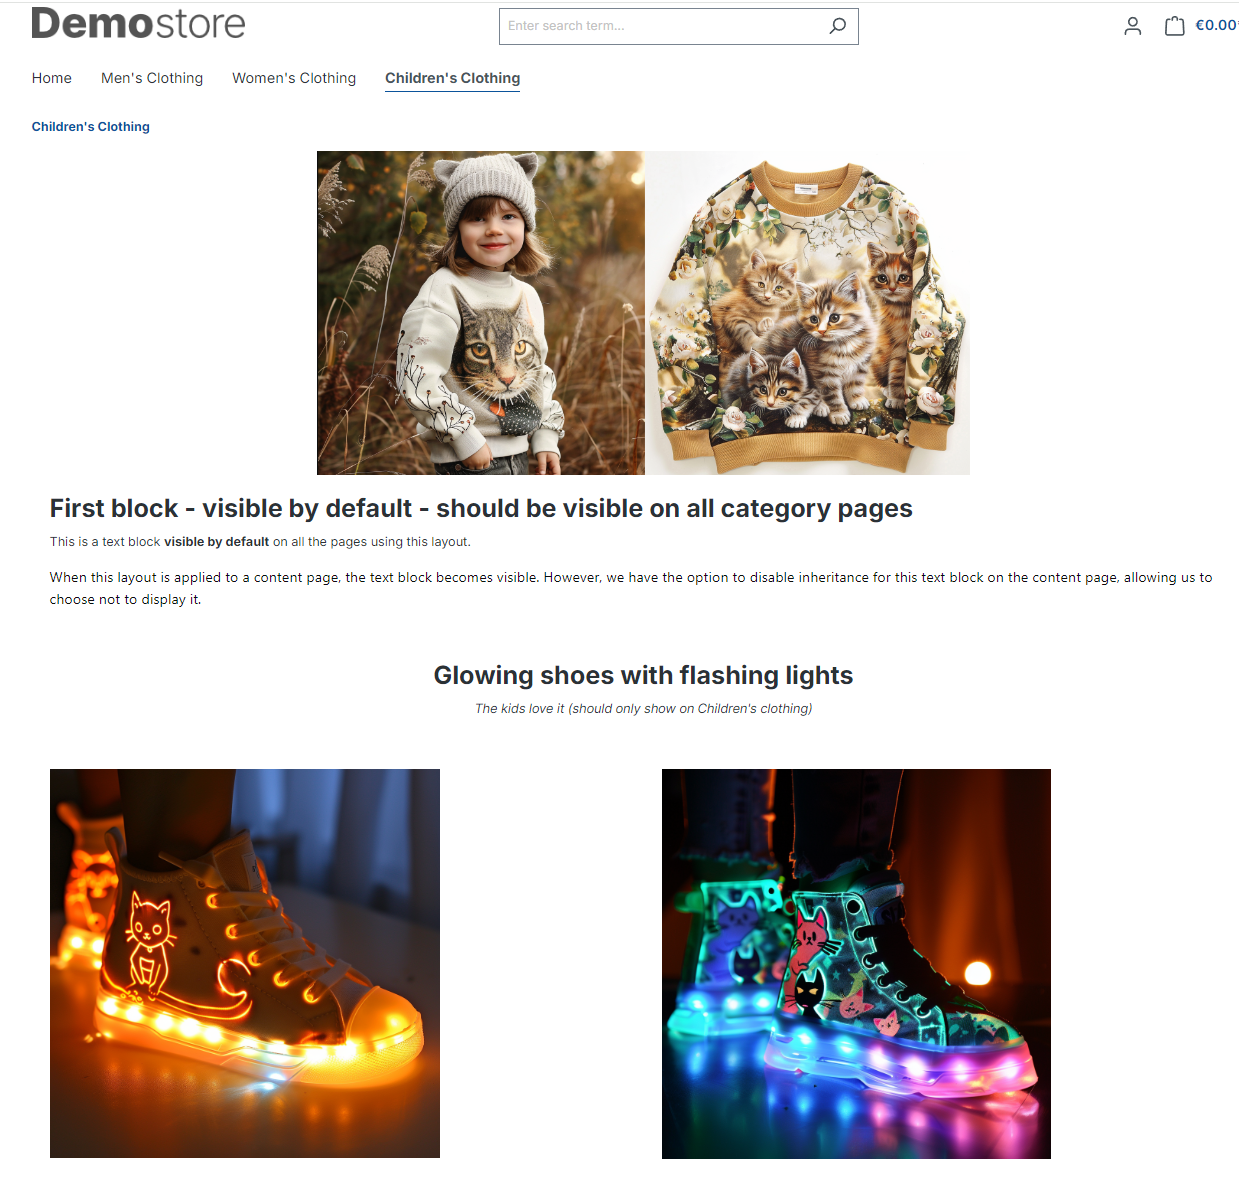
Finally, we will add elements for our "Glowing Shoes with Flashing Lights" section on the Children's clothing category page. For this, we need two elements:
- A teaser element
- A two image column element
The category pages
For our example we want to create three category pages, as shown in the next screenshot.
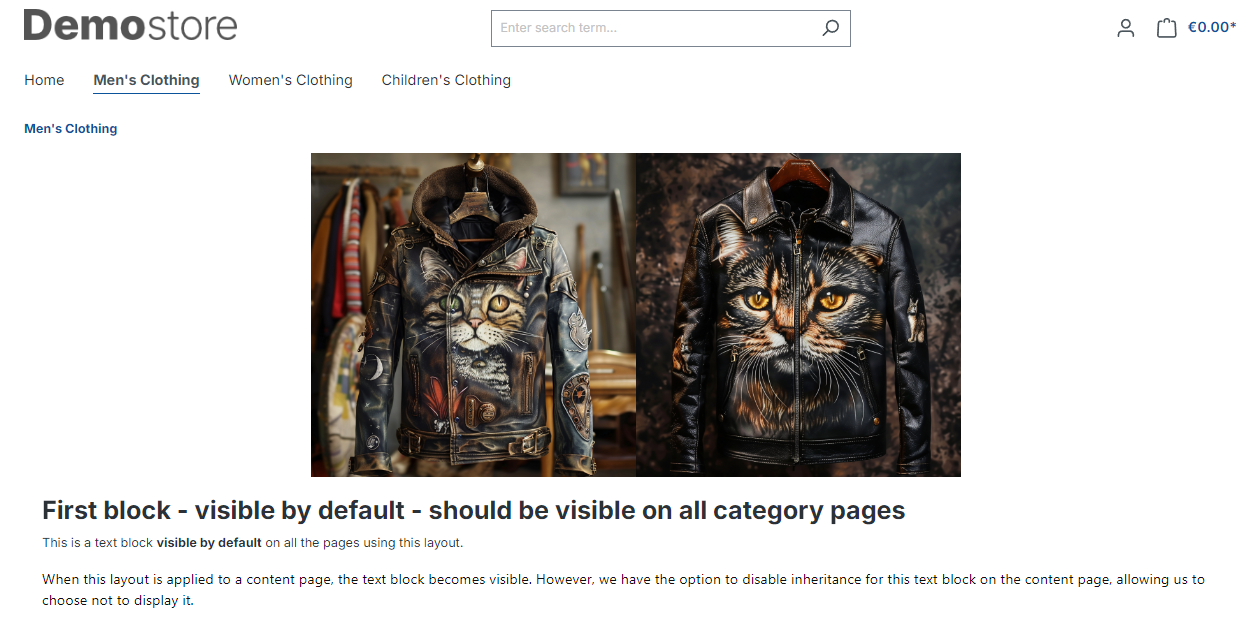
All three categories use the same layout, but with a different configuration and with different images. Let's look at the Men's Clothing category first.
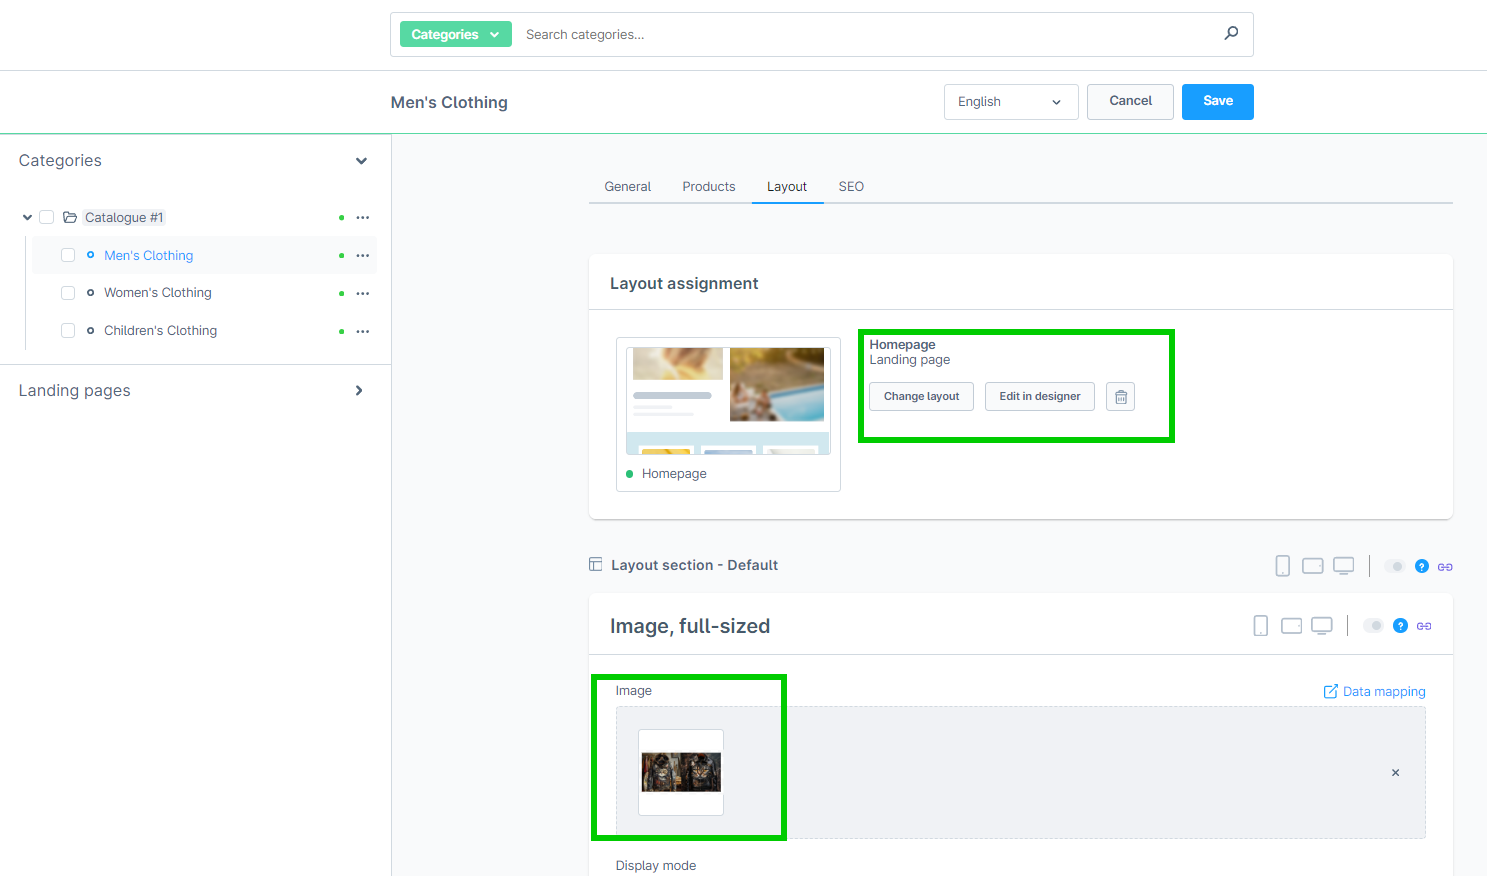
We have assigned our template. We have changed the header image. Everything else is unchanged. This gives us following frontend representation:
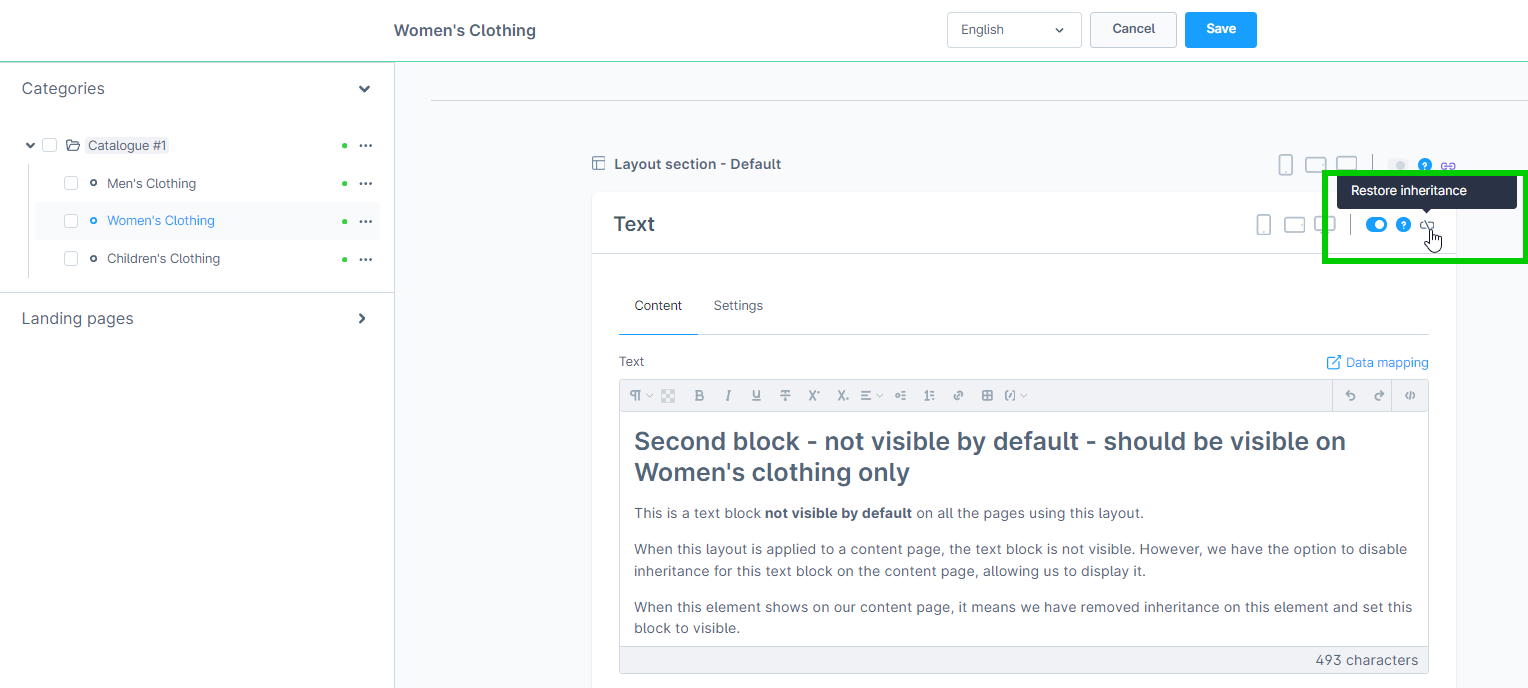
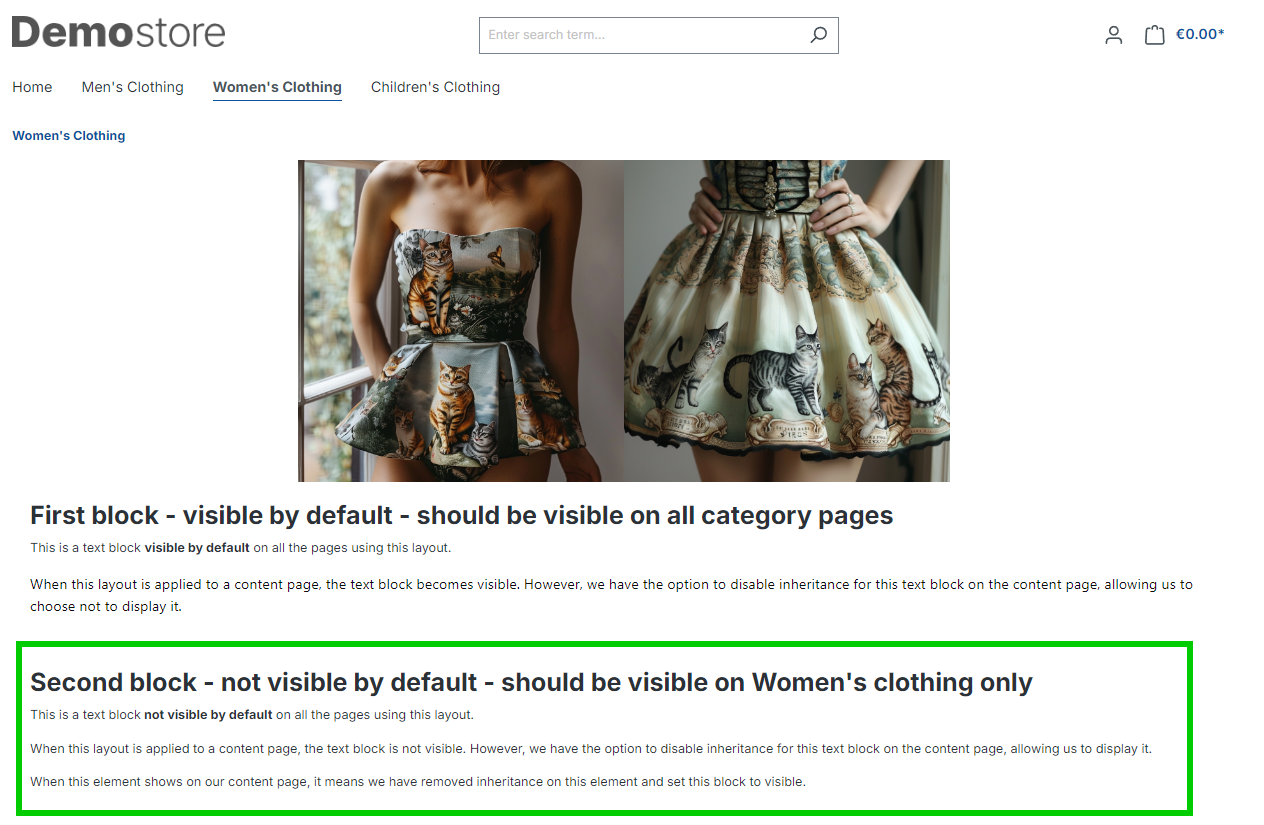
For the Women's Clothing category we configure the following. We assign our layout. Change the title image. We remove inheritance on the second text block and set it to visible (see screenshot).
This gives us the following frontend representation for the Women's Clothing category:
And finally let's take a look at the Children's Clothes category configuration. Everything works similar as before. The only difference is, that now we set the inheritance and visibility on the whole section instead of the elements. This gives us the following frontend representation:
How to use - condensed - short summary
This is the bullet point description for how to use plugin:
- Install the plugin
- Edit a layout in the Shopping Experiences: On elements and sections you have a new toggle-button. This button allows you specify the elements default visibility.
- Use your layout. You can remove the inheritance from your element and decide to show or hide your element using the same layout in different places.
Reach out, if you have questions
If you have any questions or need help. Don't hesitate to contact us. We will be happy to help.
